To direct the viewers outside the twitch, panels play a vital role. The panels also represent the streamer’s personality, traits, and abilities. Basically, links are used in the panels through which the viewers can have access to the streamer’s information. Therefore, expert streamers believe that the panels of the streamers should be distinctive and attractive. Moreover, the panels are another way to have organic fans and traffic over your streaming account.
So, have you found your twitch ever boring? If yes, then it’s time for some changes now. But how can you do that? Or what things do you need to add to a panel? Bear in mind that your twitch panel is the reflection of yourself. Thus, it needs to be perfect. If you are unaware of the twitch panels, then I have got you covered.
I have collected all the detailed information about the twitch panel in today’s article. So, let’s see how you can make things better to level up your streaming rank.
Table of Contents
ToggleWhat Are Panels on Twitch?
Like overlays and emotes, panels are the amazing options which you can customize your channel to attract viewers. It’s a significant way to create and emphasize your own mark/label to build a strong profile.
Varying on the number of panels, these panels are located under the chat box and actual video stream in the grid panel. In one row, twitch has allowed streamers to have four panels at a time. Moreover, you can also enable the monetization of your channel by donation links, an affiliation of products, and by sponsorships.
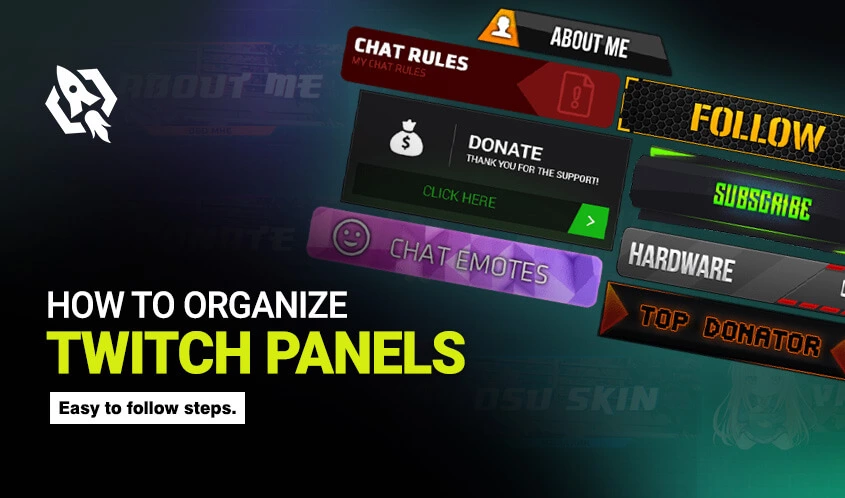
List of Twitch Panels
There are many types of panels on the twitch that you can customize by using appealing colors schemes and themes.
Following are the name of twitch panels:
- About me panel
- Rules panel
- Donations panel
- Social media panels
- Subscribe panel
- Schedule panel
- Pc specs panel
- FAQ panel
- Sponsors panel
- Community
- Leaderboard panel
- Discord panel
How to Make a New Panel?
As you see, there are several panels on the twitch, so have you decided to create a new one? See how you can make a new panel with the easiest steps in just a few clicks.
- Go to “edit panels” and hit “ON” it on your account.
- After that, tap on “+sign” and enter the new panel title.
- Add the image and all descriptions related to the panel.
- “Submit” to save the changes you made.
- After a few seconds, you will have the latest panel on your channel.
How to Edit Twitch Panels?
So, instead of creating a new channel, you can edit your Twitch panel. Let’s know how to edit panels on twitch that are already there. But how? Relax! This procedure is not daunting at all unless you adopt the most straightforward ways. Therefore, I have shared the most manageable steps that will direct you to edit the panels on the twitch.
- Tap on the “edit panel” in front of your account and “ON” it if it’s OFF.
- Once done, hit the “+sign” option and make the changes you want to add.
- “Submit” to save the changes.
How to Organize Twitch Panels?
Once you have created or edited the panel, it’s time to organize it. Organizing means adding the panels in your account where it seems perfect and eye-catchy.
Here is how you can manage your panel in just a few seconds.
- Make sure that the “edit panel” option is on. Then click on the panel you want to replace.
- Select the panel and drag it to the new place and release it.
- After that, click the OFF option in the edit panel.
- Then, you will have a final look at your panel.
How to Setup Twitch Panels – Tips
Are you aware of the item you need to add to the panel? Or do you know what things should be there in twitch panels? If not, then let me tell you that making a panel is not just enough, you also need to know what else can you add to the panels? It’s compulsory to learn because it will allow you to have a complete set panel for your account. You may have a lot of viewers on your panel too. So, let’s look at the essentials you need to have in a panel.
- Donation Requests.
- Social Media Links.
- Bio
- About Section.
- Schedule.
- Rules.
- PC Specs.
- G2A Affiliate Link
How to Add Twitch Panels?
Looking at the above items, have you decided to add a new perfect panel to your account? If yes, then do you know how you can add a new panel in just new seconds? If not, it is advised to adopt the most straightforward steps as one wrong attempt can affect your account.
Thus, here are the most manageable threads that will allow you to add a new panel to your twitch account.
- Go to your account and press on “avatar.”
- There locate the “channel” option and tap on “about.”
- From there, press the “edit panels” and allow to make changes.
- Customize the panel, and when you are done, “submit” the changes.
- After some time, a new channel will appear on your account.
- You can arrange them by dragging the panel with the help of your cursor.
How Big Are Twitch Panels?
While editing or making a new panel, are you facing any errors? Well, this can happen because you are using the wrong size panels. Let me tell you that the standard size of the panel on twitch is 320 × 200 px. Using this size ensures you will never encounter any bug during the formation of panels.
Conclusion
Like overlays, panels are also the finest feature for representing your personality to the visitors on your account. Therefore, having an appealing and perfect size is the best way to attract their attention. Follow the above methods, develop a distinctive and attractive panel, and rank the twitch world.


